Traxxas Batteries Should I Charge Again if Sitting for a Few Months
Chargers. They are a necessary part of our radio control lives these days. With LiPo batteries becoming the standard for R/C cars and trucks, much equally they already take for airplanes, helicopters and drones, more people are finding themselves with avant-garde multi-chargers, capable of much more the average user volition ever need. However these chargers are, like the LiPo batteries unremarkably used on them, increasingly complicated and sometimes downright hard to utilize. And nearly of the manuals furnished by the manufacturers (if i is even included at all) go out much to the imagination.
I've had customers complaining most this for years now – so much so that we routinely sit down downward with a customer immediately after he or she purchases one of these chargers in an endeavor to explain how to do the specific things needed for their purposes, whether it'south residue charging a LiPo battery, put a LiPo at storage voltage, or just accuse a NiMH battery. Inevitably, that customer will call again with questions, considering these chargers are then complicated that it takes multiple attempts to use information technology fluidly.
So in this guide, I'm going to go through a few of the standard things that beginners should know well-nigh the chargers, equally well as nowadays walkthroughs for standard uses for them. This guide is based around the Hitec X1 AC+, Hitec X4 AC+, Venom Pro Chargers, and others.
Multi-Chargers, Defined
What is a multi-charger, yous ask? I will define information technology as a charger capable of charging multiple chemistries of batteries, including Lithium-Polymer (LiPo), Lithium-Ion (Li-ION), Lithium-Iron Phosphate (Li-Fe), Nickel Cadmium (NiCd), Nickel-Metal Hydride (NiMH), and Pb-Acrid (Pb) Batteries. Most modern multi-chargers also take the built-in power to residual LiPo cells, and the better chargers besides accept a LiPo storage part. Additionally, they should all be capable of minute adjustments in accuse current, ideally in increments of 0.1 Amps.
At that place are various other attributes that some multi-chargers have that are not necessary for near users. Some are Air conditioning and DC powered, meaning they can plug into the wall or hook up to whatsoever 12V source and be used. Some are DC-only, and require a 12V ability supply for use at home. Some charge more one bombardment, and some don't. Some of these attributes are nice to have, just non necessary to fit my definition of 'multi-charger'.
Breakdown of the Charging Screen
This is the screen that you will eventually get to when the battery is charging.

-
Battery Blazon: This indicates the type of battery you are charging. In this specific case, we're charging a two-prison cell Lithium-Polymer battery, otherwise known every bit a "2S" LiPo.
-
Charge Rate: This indicates the current charge rate. Even though you might ready it to a specific number, it will change over time, depending on the battery you lot are charging.
-
Battery Voltage: This shows the current battery voltage. This is non necessarily indicative of the voltage upon unplugging the battery from the charger, since at that place is nearly always a tiny corporeality of current flowing into the battery, which may inflate the value slightly.
-
Function: This shows whether you are charging, balance charging, discharging, or storing your battery.
-
Time Elapsed: Shows the fourth dimension elapsed since the charge began.
-
Capacity Charged: This value is the total amount of mAh the charger has put out. Information technology does not accurately indicate the amount of mAh the battery has retained, so this is merely gives the user a ballpark idea of the charge level.
Before We Go Further
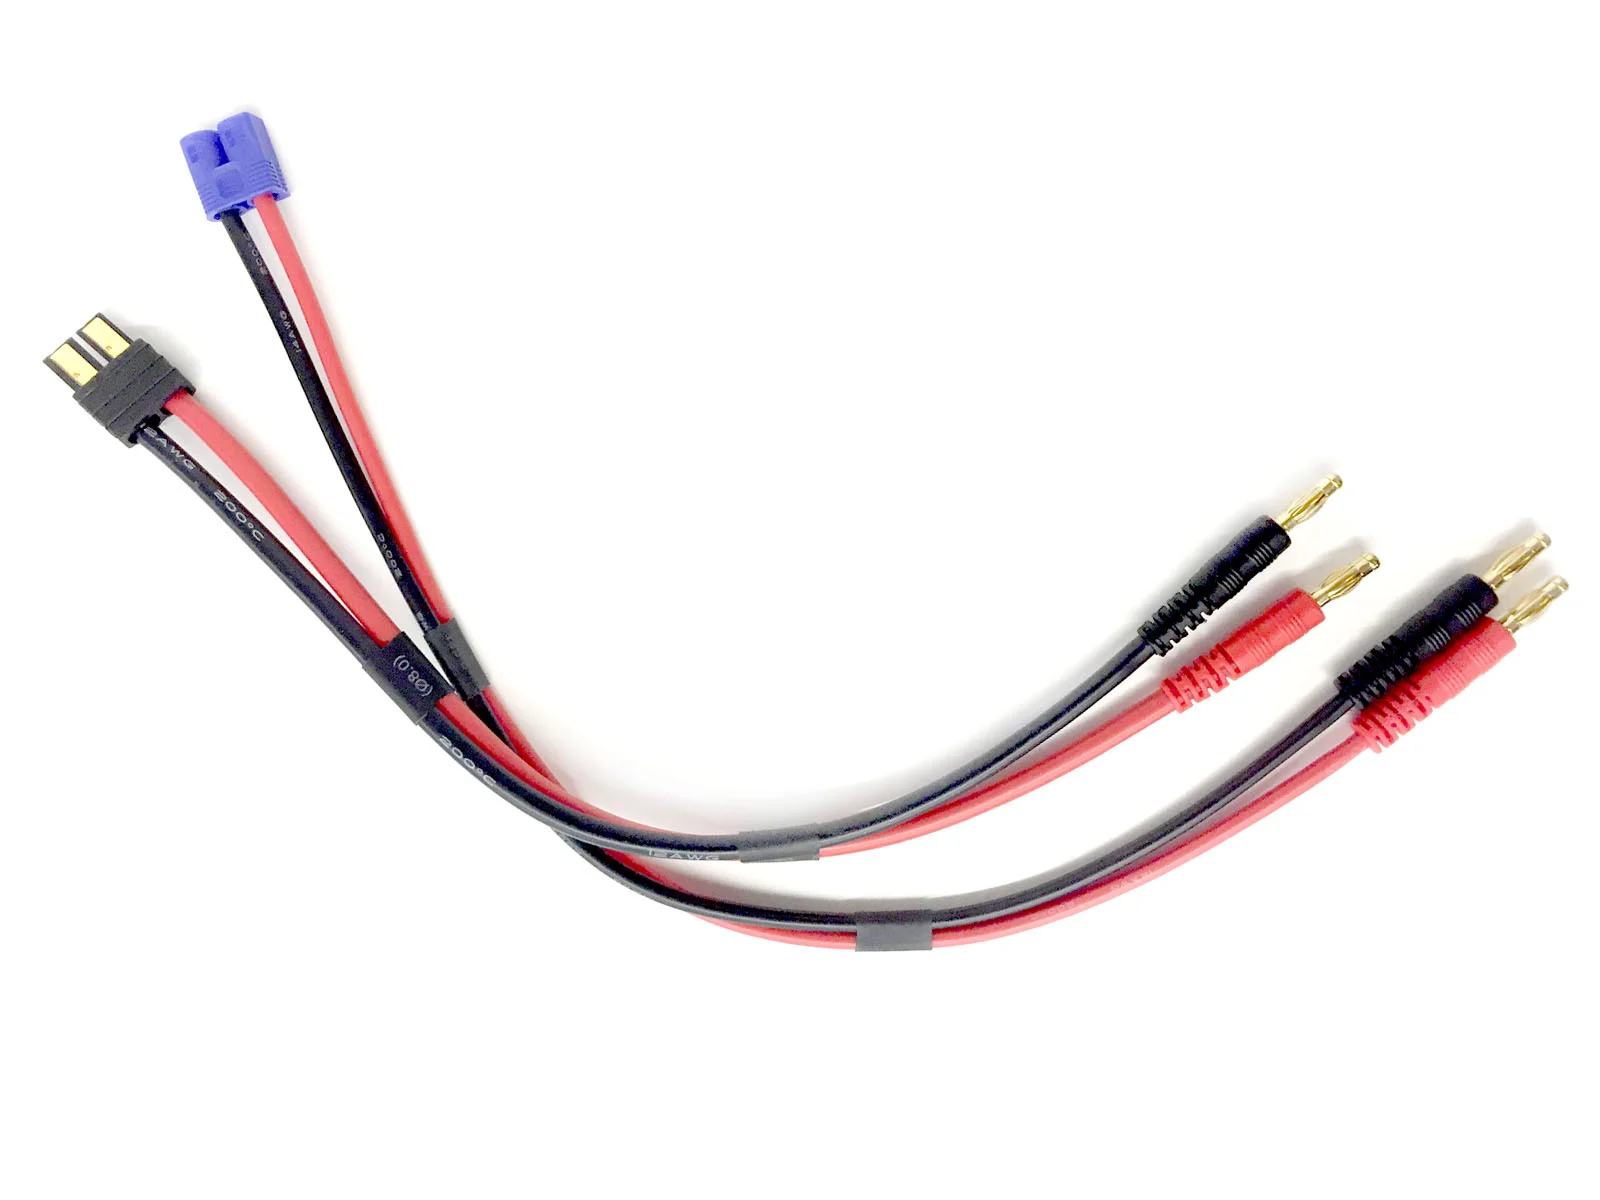
Make sure you have the correct charge lead plugged into the charger. Otherwise you won't be able to accuse your battery. Most chargers don't come with a wide variety of accuse leads – commonly merely one or two. Be sure to buy the proper charge pb from your local hobby shop, whether you use Traxxas plugs, Deans Plugs, EC3 Connectors, XT60s, Power Poles, or anything else.
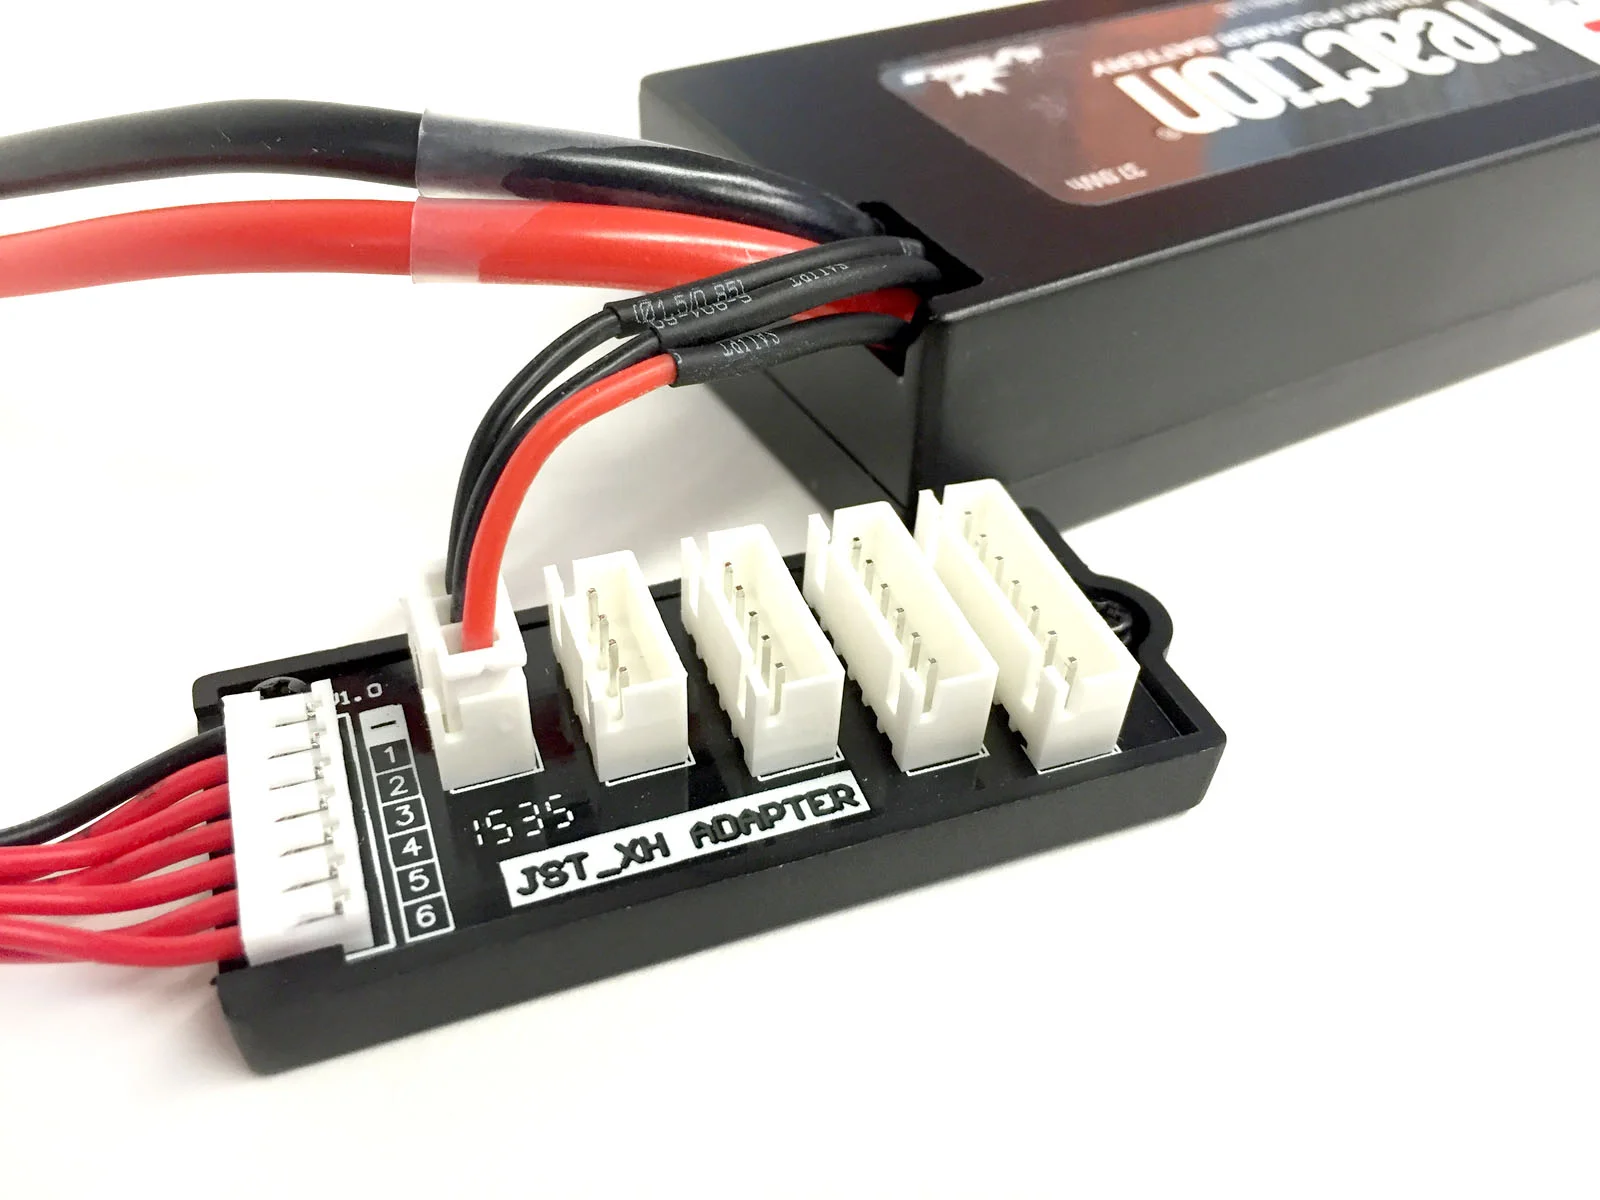
LiPo balancing (which nosotros will get more into later) requires the employ of a balancing board for most chargers. Any charger with a built-in balancer will usually come with at least one. Yous can see a bombardment plugged into the residual lath here. If the balance atomic number 82 on your battery is too short, y'all may need to pick up a balance extension from your local hobby shop.
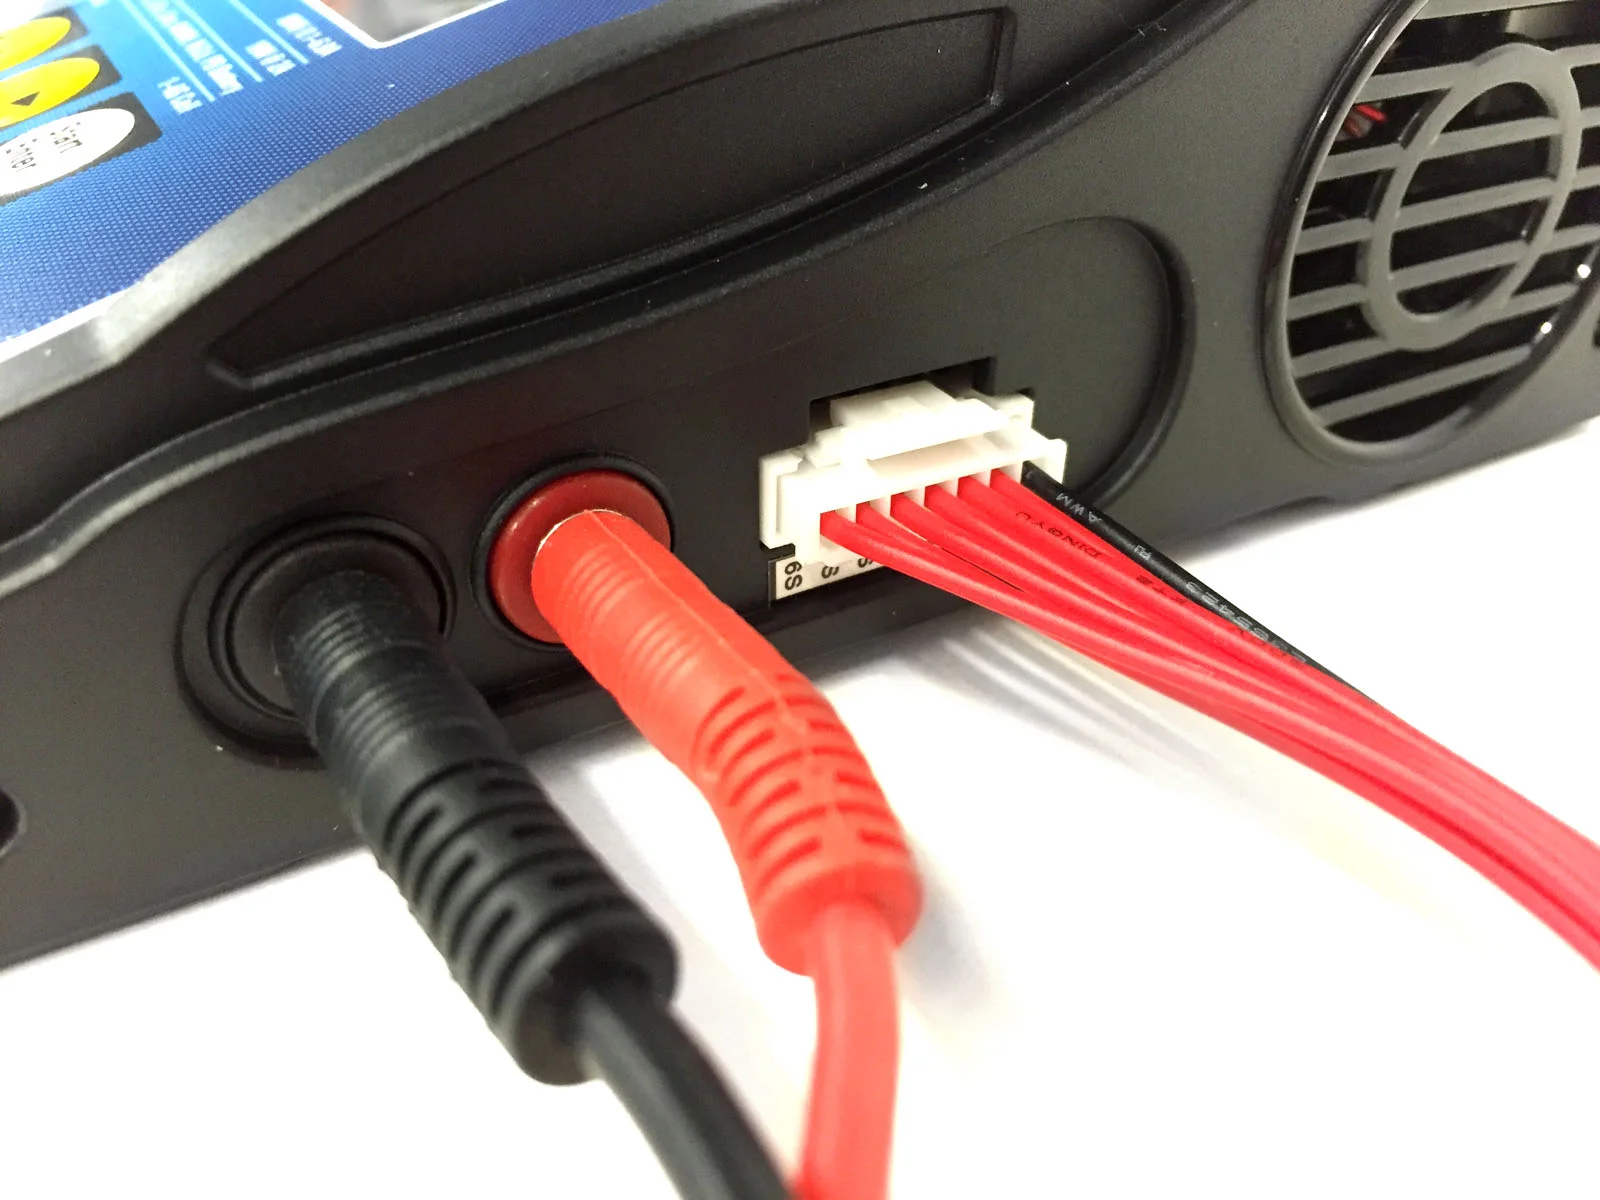
Brand sure that your charge lead is plugged into the charger, and verify that the polarity is right. Red should be plugged into red, and black into black. Also make sure the charger end of the residuum board is plugged in to the charger, if you're charging LiPo batteries. Besides, plug in your bombardment to the charge lead.
NEVER Accuse A BATTERY UNATTENDED!
While these chargers are very advanced, there are still many things that tin can go wrong. Following all the proper protocols will forbid about accidents. Only only every bit existence a safe driver doesn't foreclose 100% of accidents from occurring, following the proper instructions won't preclude a fire or another unfortunate incident. Be shut enough to react to any chance that may crop up. Have a fire extinguisher nearby. For LiPo batteries, accuse them in a fireproof container, whether information technology's a LiPo Sack or a ceramic pot – anything that will incorporate a fire. These condom tips aren't meant to scare, but it'due south meliorate to be safe than sorry.
A Minor Aligning Earlier We Get-go
Well-nigh chargers that run this firmware take a Capacity Cut-Off enabled from the factory. This is a safety mechanism that will shut the charger off when the bombardment reaches a sure capacity charged. This cap is usually v,000mAh. Depending on the battery yous're charging, this tin exist problematic.
In the example that we are charging a well used 5000mAh LiPo, it'southward certainly possible for the charger to need to put out 5000mAh – 5500mAh to fully charge the battery. This is because nothing is 100% efficient. The charger can only measure out what it puts out, not what the bombardment actually absorbs. The rest of that energy is released from the battery equally oestrus, which is why batteries heat up when beingness charged.
If the charger cuts off at 5000mAh, just the battery requires a scrap more free energy to fully charge, you'll never get a total charge on your battery. But there is a way to fix this, and enhance the cap up to a manageable level. Let'due south practise that now, then we don't have to worry almost it in the future.
Step 1
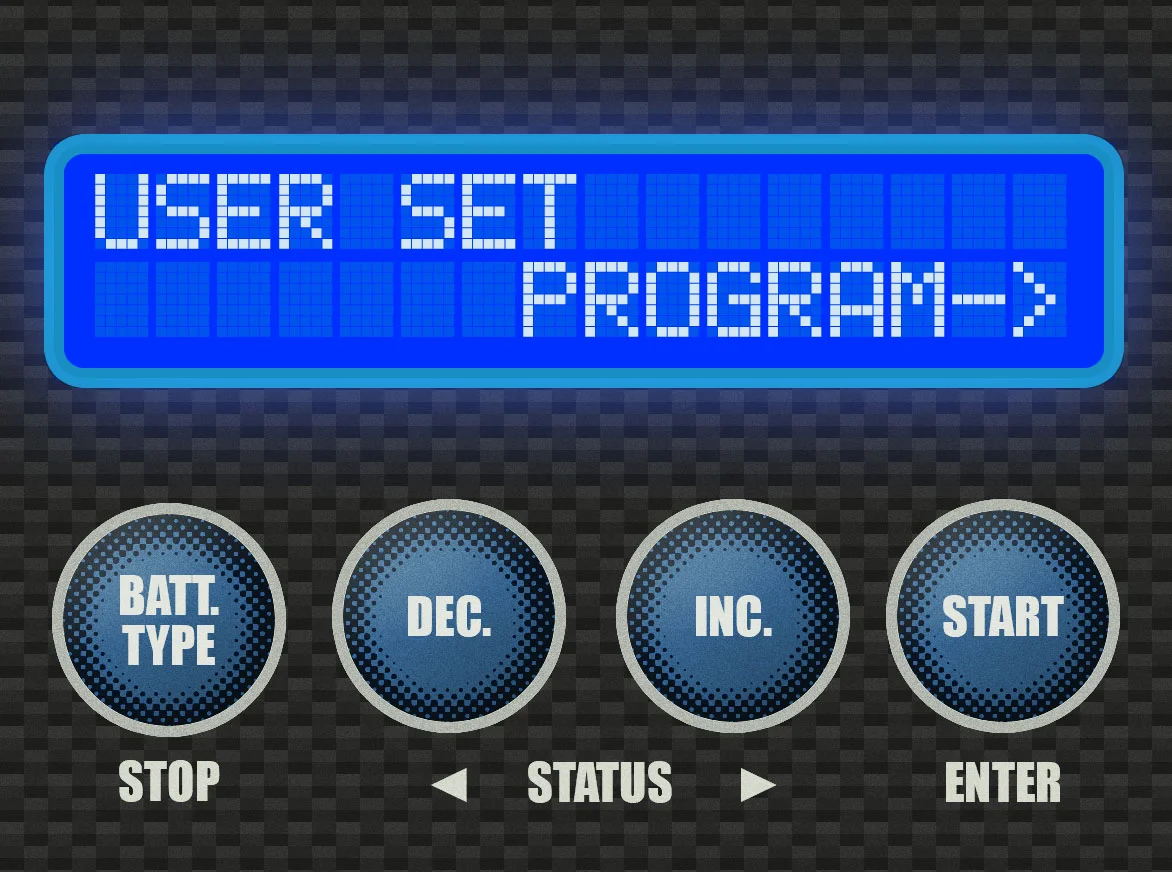
Press the [BATT Type] button plenty times to encounter this screen. Go ahead and press the [Starting time] push to enter the next screen.
Step two
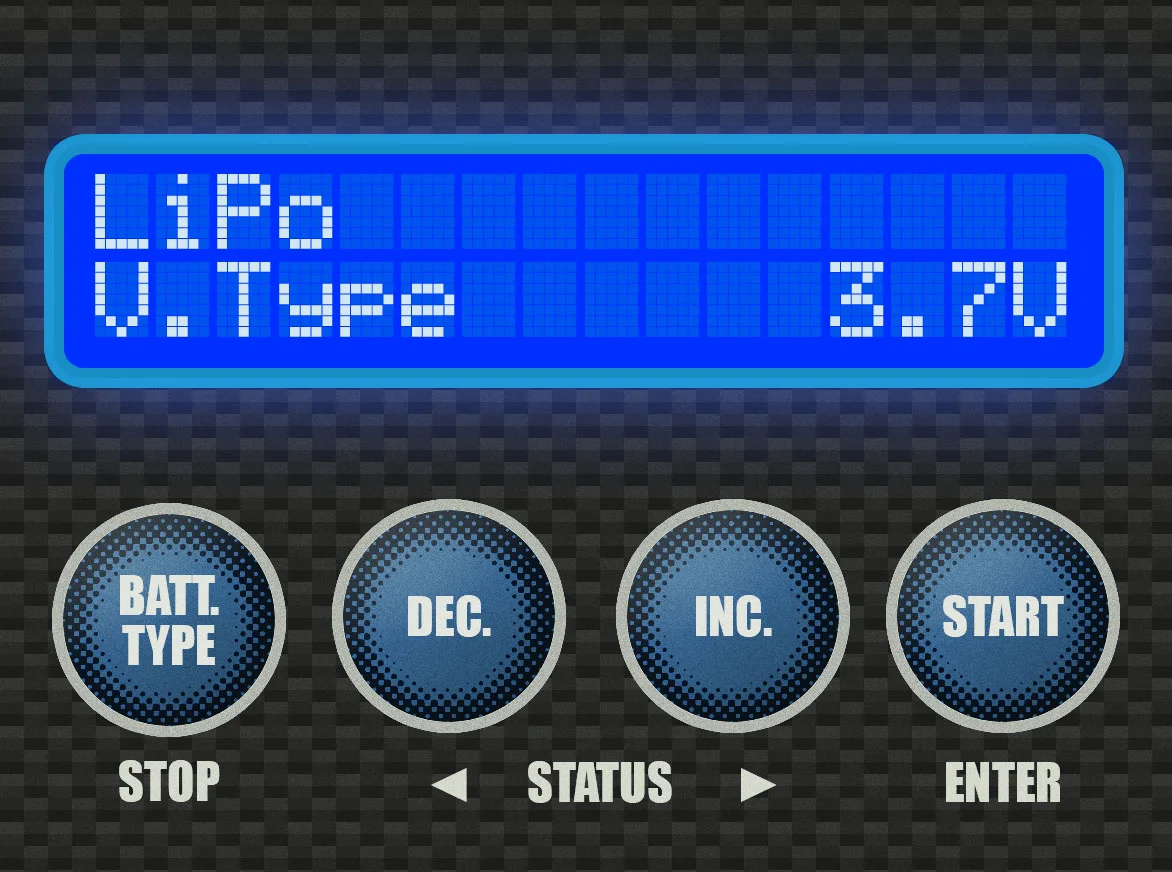
You lot should see the "LiPo V.Blazon" screen. At this screen, press the [DEC.] push three (three) times.
Step 3
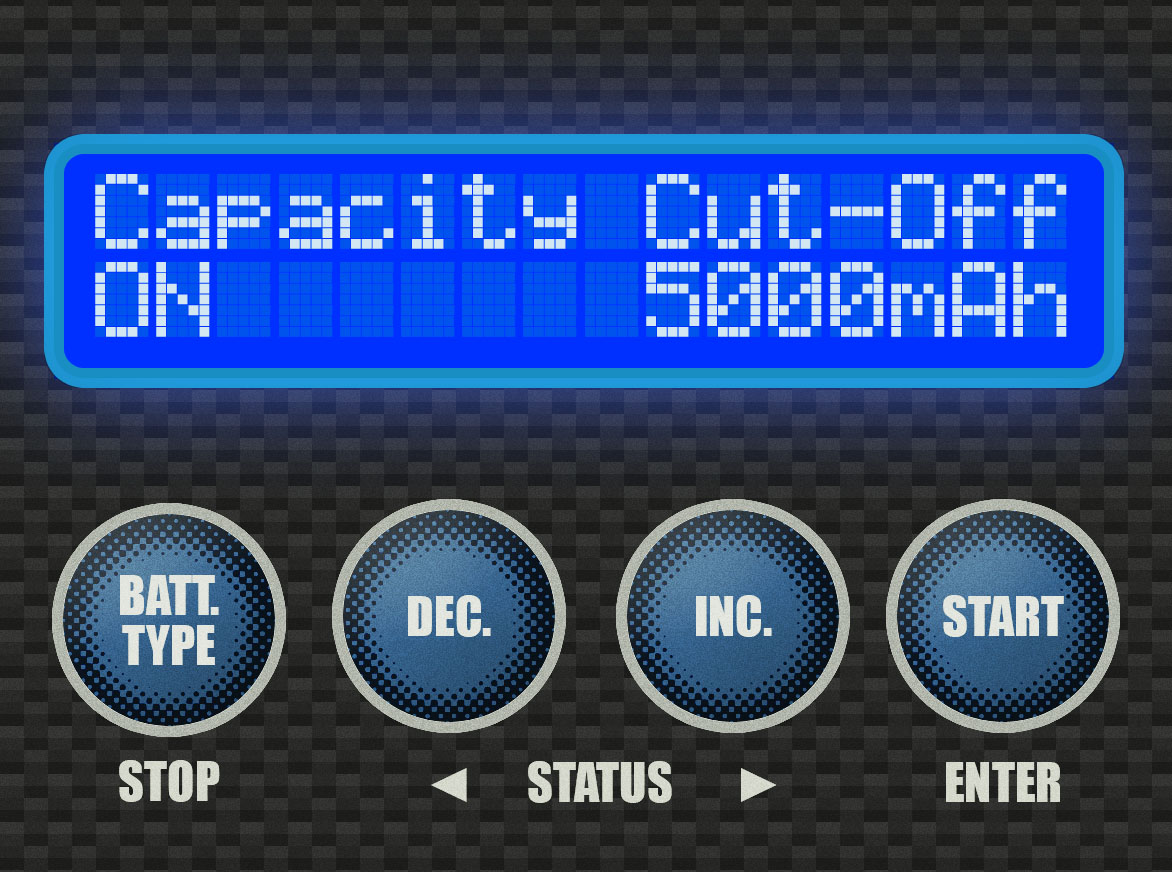
This is the Capacity Cut-Off screen. We want to exit the cut-off on, but enhance the limit. Let'due south outset by pressing the [START] Button. The "ON" volition begin to glimmer. Press [START] once more to motility on to the capacity.
Step 4
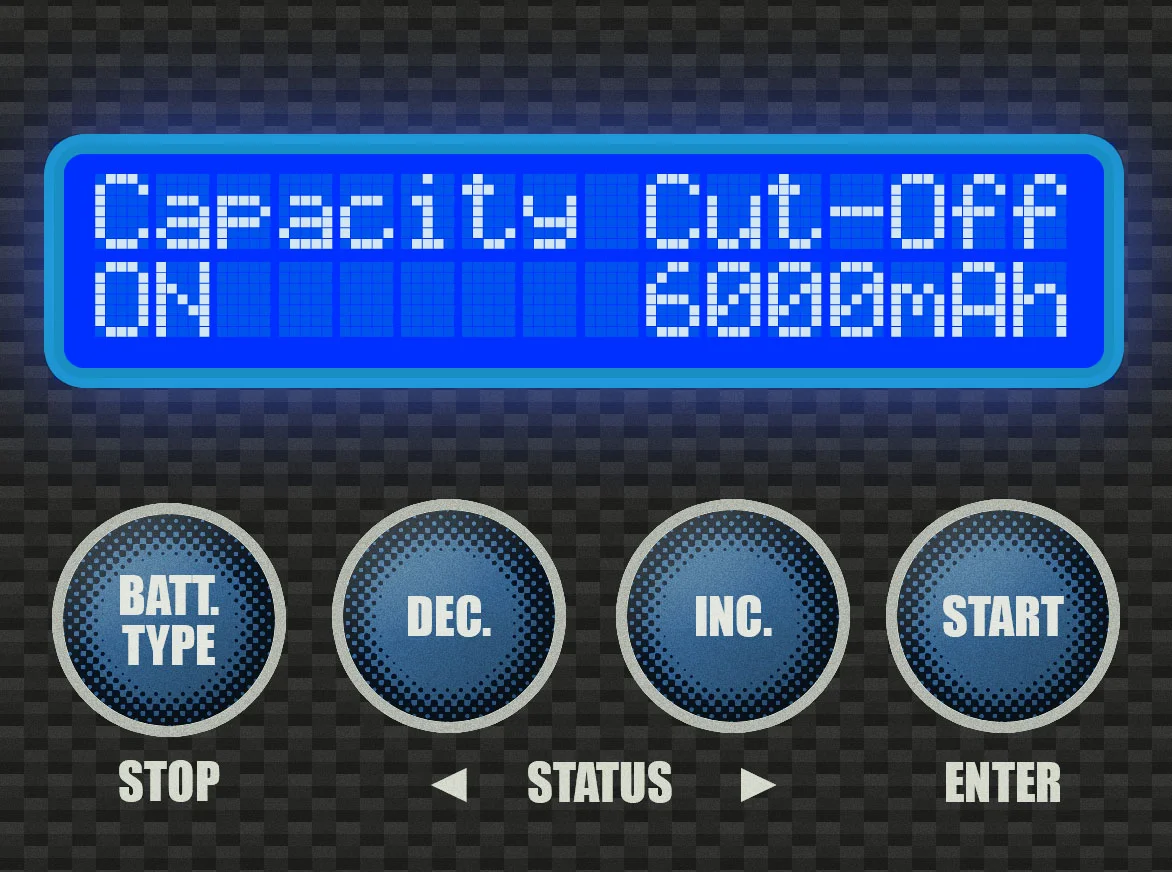
Now that the "5000mAh" is blinking, press the [INC.] push button to increase the capacity. Permit's set it to 6000mAh. Once you're there, press [START] once more, and the change saves.
You lot can now press [BATT TYPE] to get back to the primary menu.
How to Charge a Ni-Cd Battery
NiCd and NiMH batteries are probably the easiest type of batteries to accuse on a multi-charger, since the charger will motorcar-detect the number of cells, and the only variable is the rate of charge. For this walkthrough, we'll assume the battery is a six-cell (seven.2V), 1800mAh NiCd battery.
Step 1
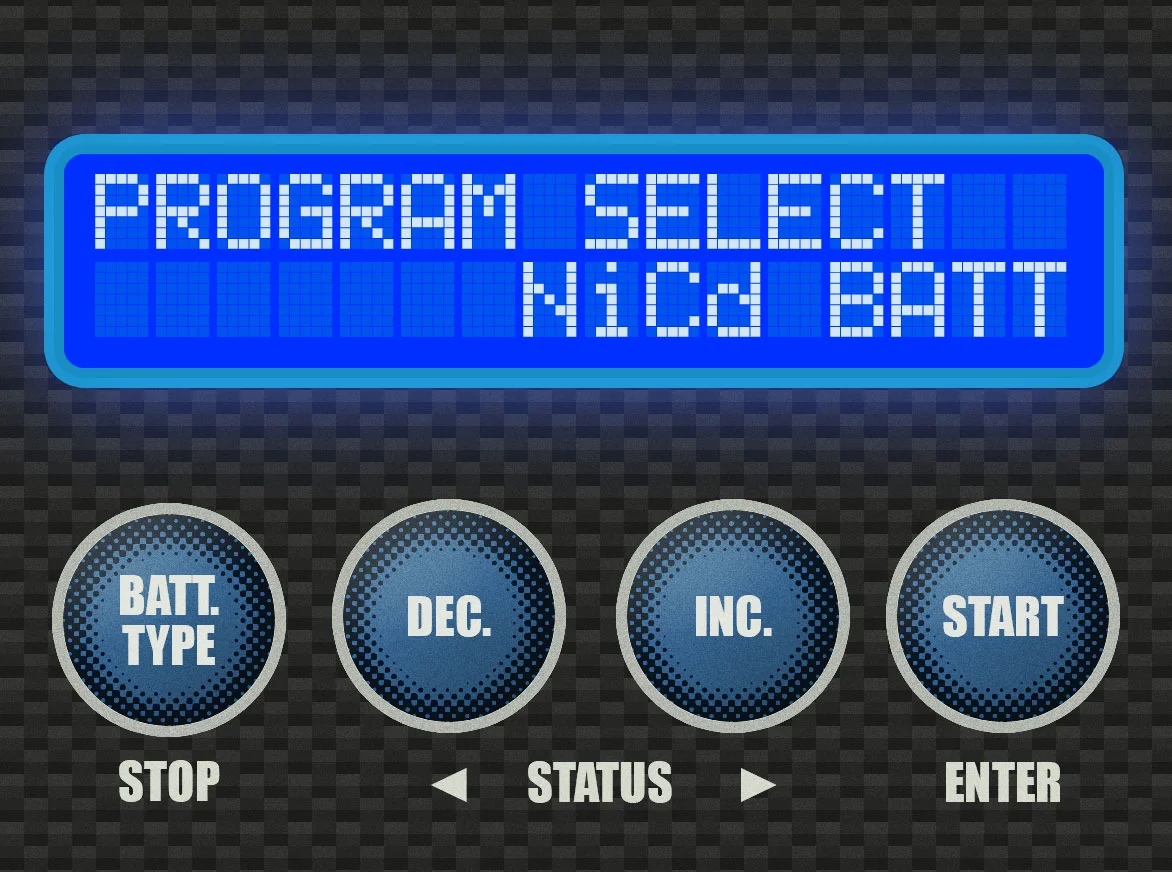
Press the [BATT TYPE] button enough times to see this screen.
You should accept the battery plugged in at this point.
Step 2
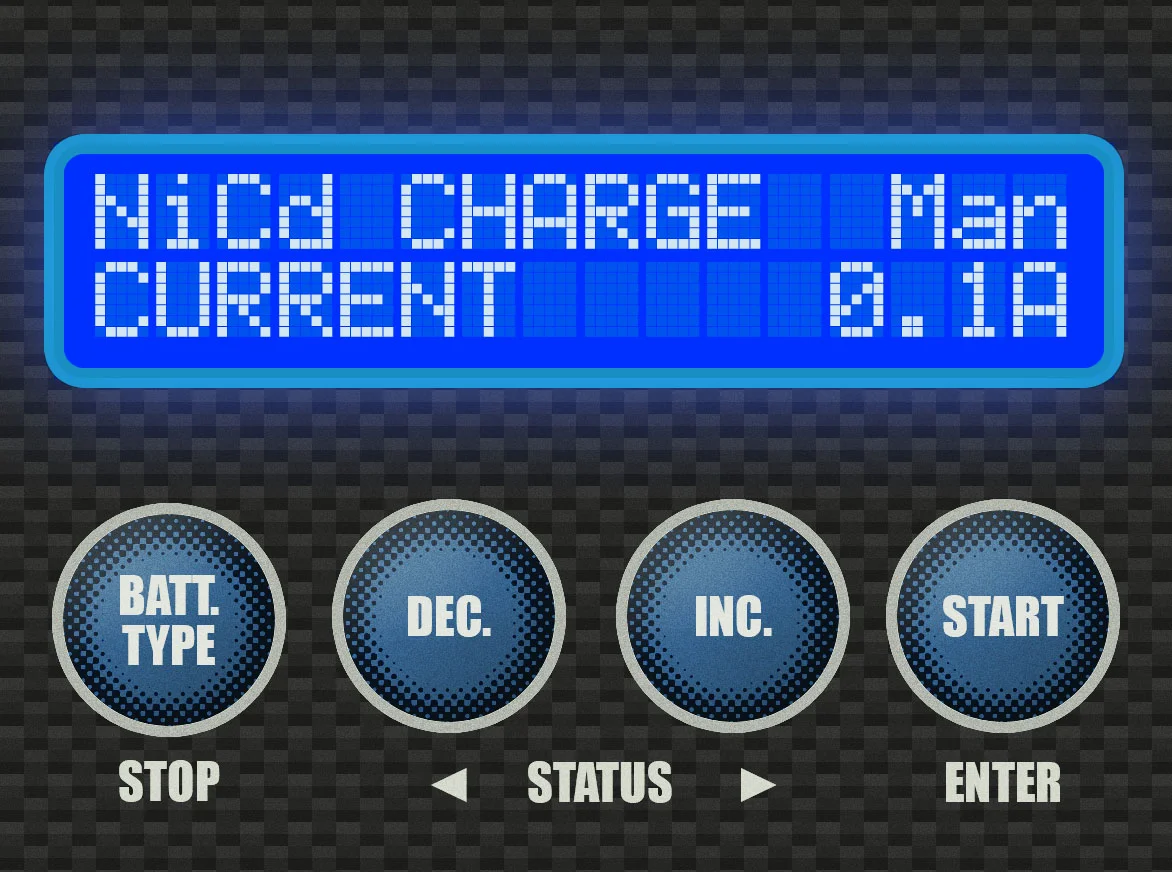
Press the [Commencement} button. This screen should bear witness up, in some variation. The number followed by the "A" could exist anything from 0.1A to 6.0A.
Press the [Outset] push button again. The 0.1A will start to blink.
Step three
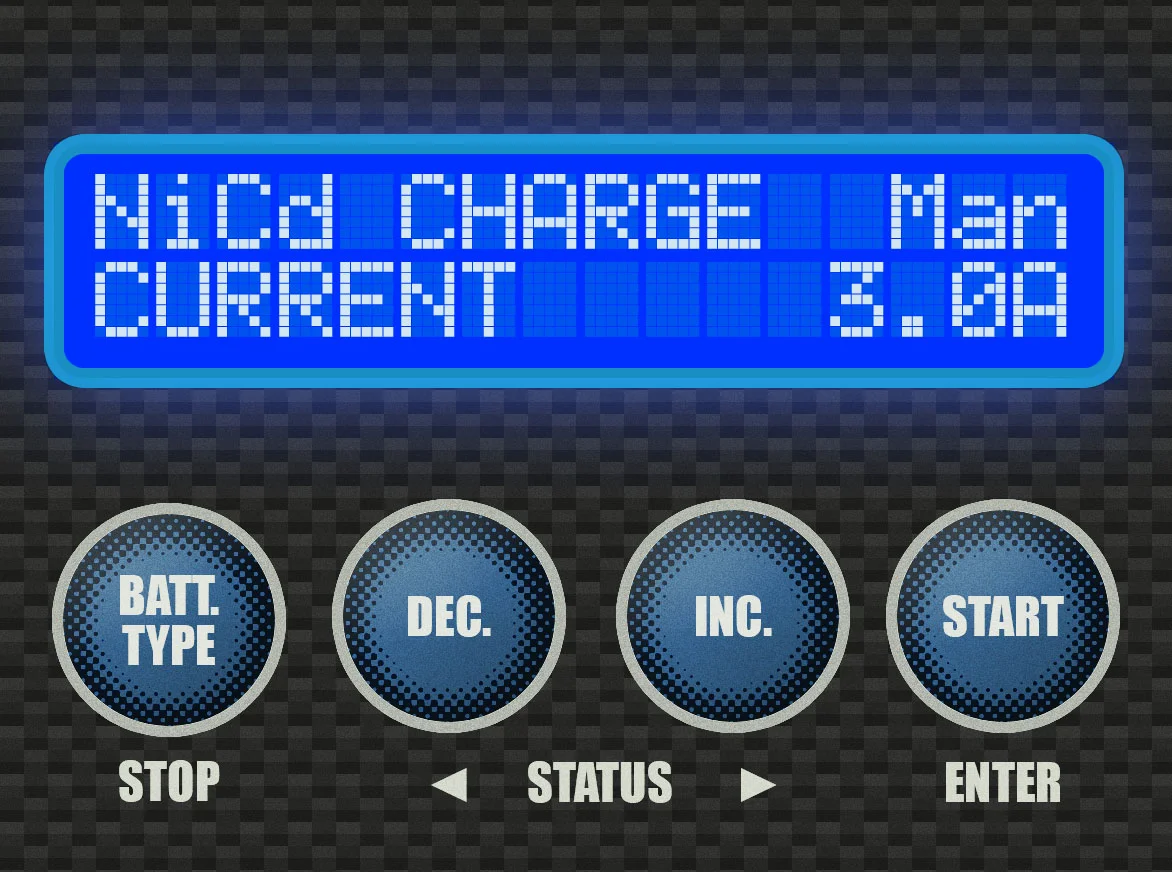
For this 6-cell 1800mAh battery, I normally charge at a 3.0A rate. Check your bombardment to see if it requires a specific charge rate.
Employ the [INC.] or [Dec.] buttons to select your charge rate. Information technology will go up or down in increments of 0.1A. Once y'all're at the correct charge charge per unit, press and hold the [START] button.

Step four
When y'all press and hold [Kickoff], the charger will beep and flash this message to you. Then it will proceed to the next screen.
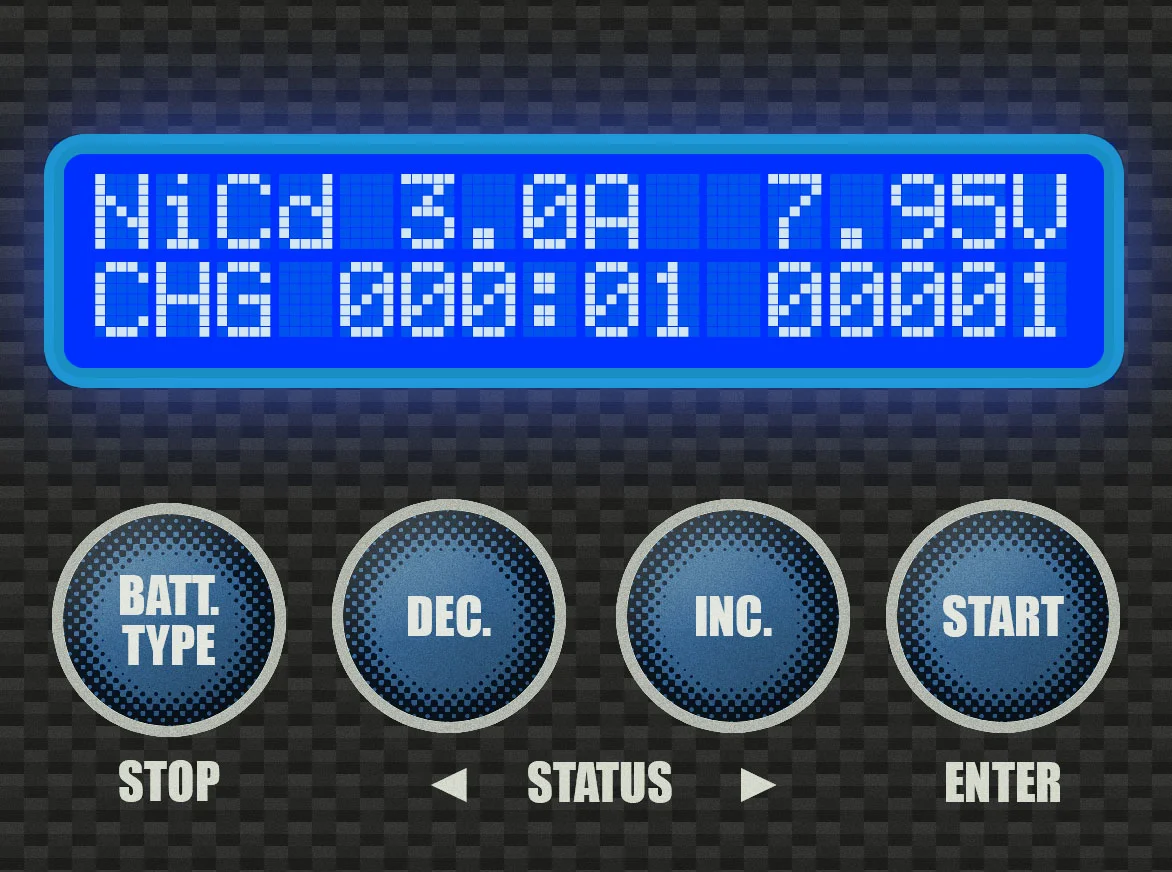
Pace 5
Yous're charging! The charger will beep when information technology detects a total charge on the battery.
How to Accuse a NiMH Battery
NiMH batteries are what most beginners in the R/C car or truck will use at first, and come up stock in almost every vehicle that includes a battery. For this walkthrough, nosotros'll assume the battery is a 7-prison cell (8.4v), 3000mAh NiMH battery (such as a stock Traxxas battery).
Step 1

Step 1
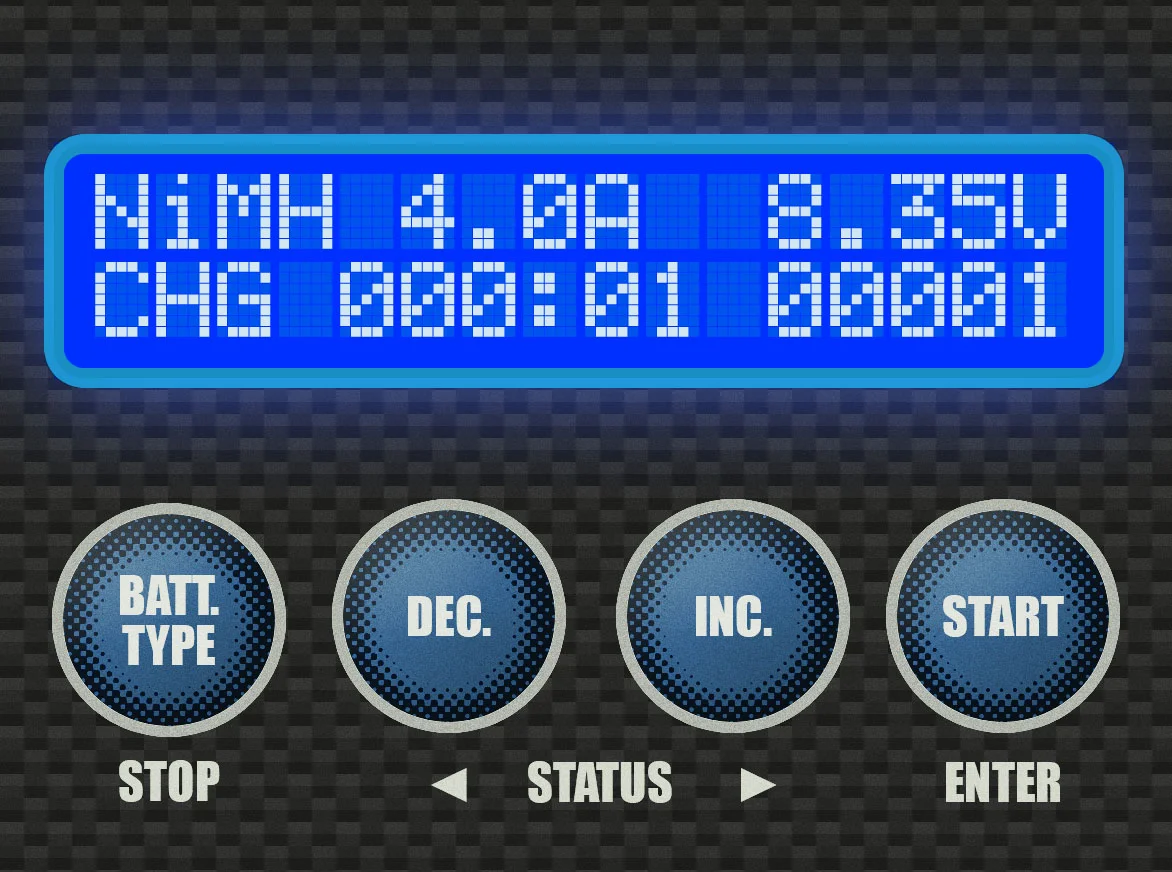
Press the [BATT TYPE] button plenty times to come across this screen.
You should have the bombardment plugged in at this betoken.

Step 2
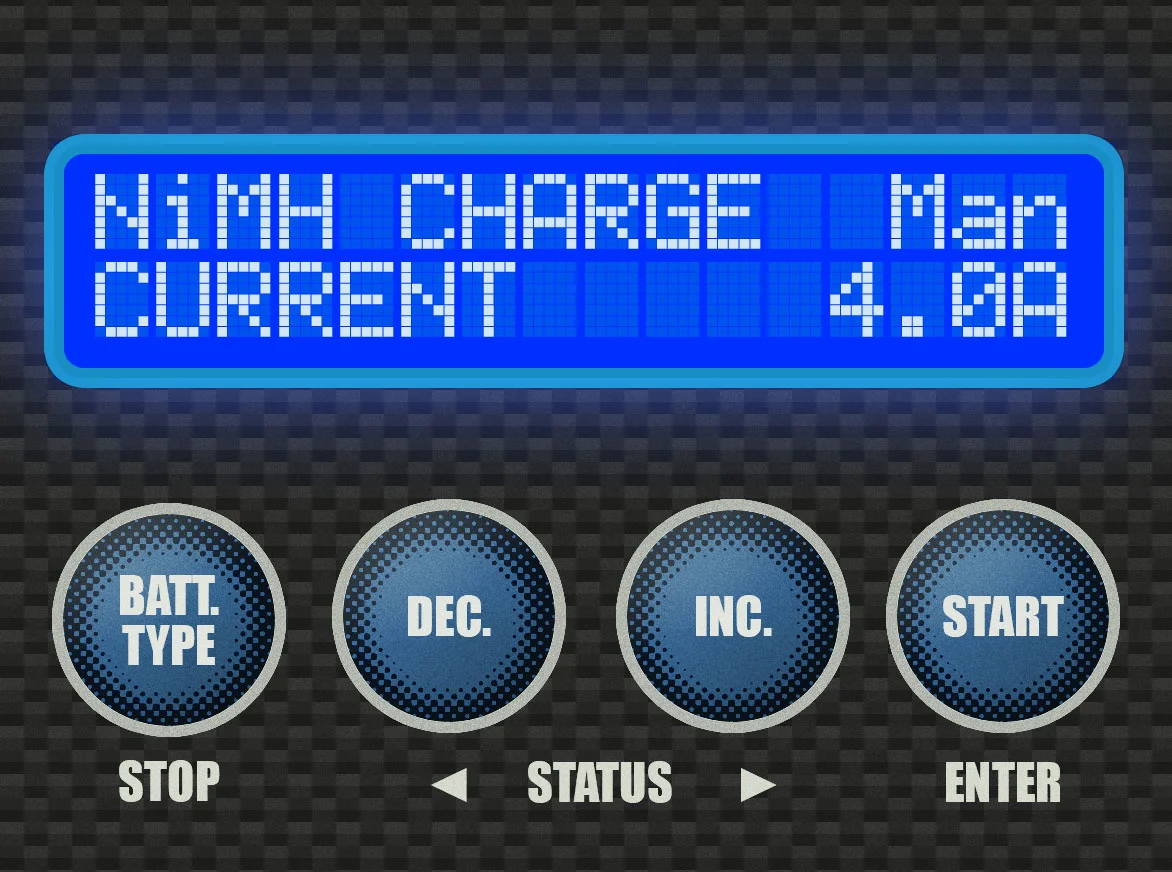
Press the [START] button. This screen should show upward, in some variation. The number followed by the "A" could be anything from 0.1A to 6.0A.
Press the [START] push button again. The 0.1A volition showtime to blink.
Step 3
For this 7-cell 3000mAh bombardment, I commonly recommend a charge charge per unit of 4.0A; you can accuse information technology slower, but I wouldn't charge it any faster than that. Check your battery to run across if it requires a specific charge rate.
Employ the [INC.] or [DEC.] buttons to select your charge rate. Information technology will go upwardly or down in increments of 0.1A. One time you lot're at the correct charge rate, printing and hold the [START] button.

Step iv
When yous press and hold [START], the charger will beep and flash this message to you. Then it volition proceed to the next screen.
Footstep 5
You're charging! The charger volition beep when it detects a full charge on the battery. Call back, never accuse a battery when you aren't around; it'south not safe!
LiPo Batteries Are Unlike
LiPo batteries require more than care and attending than their older brethren. I practice cover this in much more detail in my article, A Guide to LiPo Batteries, simply I want to comprehend a few of the details relevant to charging, balancing, and storing the batteries in this article every bit well.
Balancing
Balancing is a term we use to describe the act of equalizing the voltage of each prison cell in a battery pack. We balance LiPo batteries to ensure each jail cell discharges the same amount. This helps with the performance of the battery and helps maintain the battery's wellness. Since all of the chargers this article is well-nigh have a built-in balancer, it would be silly to not use information technology. I recommend balancing your LiPo battery every time you accuse – non because you have to, simply because information technology makes sense to become in the addiction. That way you never accept to worry about forgetting when you lot last balanced the bombardment.
Charging
Near LiPo batteries need to be charged rather slowly, compared to NiMH or NiCd batteries. While we only charged a 3000mAh NiMH battery at four amps, a LiPo battery of the same chapters should be charged at no more than three amps. For the vast majority of LiPos, the Charge Rate is 1C.
And then, for a 3000mAh bombardment, we would want to charge at 3A, for a 5000mAh LiPo, we should set the charger at 5A, and for a 4500mAh pack, four.5A is the correct charge charge per unit.
Some batteries tin be charged faster than 1C. Always brand sure your battery is capable of being charged at a college C-rating before doing so — y'all could have a fire on your hands if you don't! If your bombardment doesn't specify the proper charge rate, always assume it can only be charged at 1C.
Storage
In the former days, we used to run our cars or airplanes until the batteries died, and so just gear up the batteries on the shelf at home, waiting for the next time we could employ them. Nosotros just stored them expressionless. But you lot should not practise that with LiPo batteries. Nor should LiPo batteries be stored at total charge, either. For the longest life of the batteries, LiPos should be stored at room temperature at iii.8V per cell. All of the chargers discussed in this article have a LiPo Storage function that will either accuse the batteries up to that voltage, or belch them down to that voltage, whichever is necessary.
I recommend to our customers that they put their LiPo batteries in storage mode after every run. This isn't necessary per se, just information technology does build up skillful habits. If this is washed every time, you don't accept to worry about whether or not you remembered to put information technology in storage. I accept had many customers come up to me with batteries that died because they charged it upwards, intending to apply information technology, but life got in the way and they never remembered to put information technology back to storage voltage. Lithium-Polymer batteries tin can be damaged by sitting fully charged in as little as a week. So don't forget to put your LiPos at storage voltage when y'all're washed using them.
Now that we take that out of the way, let's become on to how to charge and store our LiPo batteries.
How to Balance Accuse a LiPo Battery
LiPo batteries require a chip more piece of work to charge and balance, so this is going to have a few more steps than NiMHs or Ni-Cds, so permit's go to work. In this example, I volition use a common battery nosotros sell, a 5000mAh, 2S (2-cell) LiPo. You should take both of your bombardment's leads plugged into the charger at this indicate.

Footstep one
Printing the [BATT TYPE] push button enough times to see this screen.
Again, you should take the battery plugged in at this indicate, both to the main charge lead and also to the residue board.
Press [Get-go].

Footstep 2
This screen should bear witness upwards, in some variation. The number followed by the "A" could be anything from 0.1A to half-dozen.0A.
Dissimilar the last couple batteries, we don't want to use this screen. Press the [INC.] button.
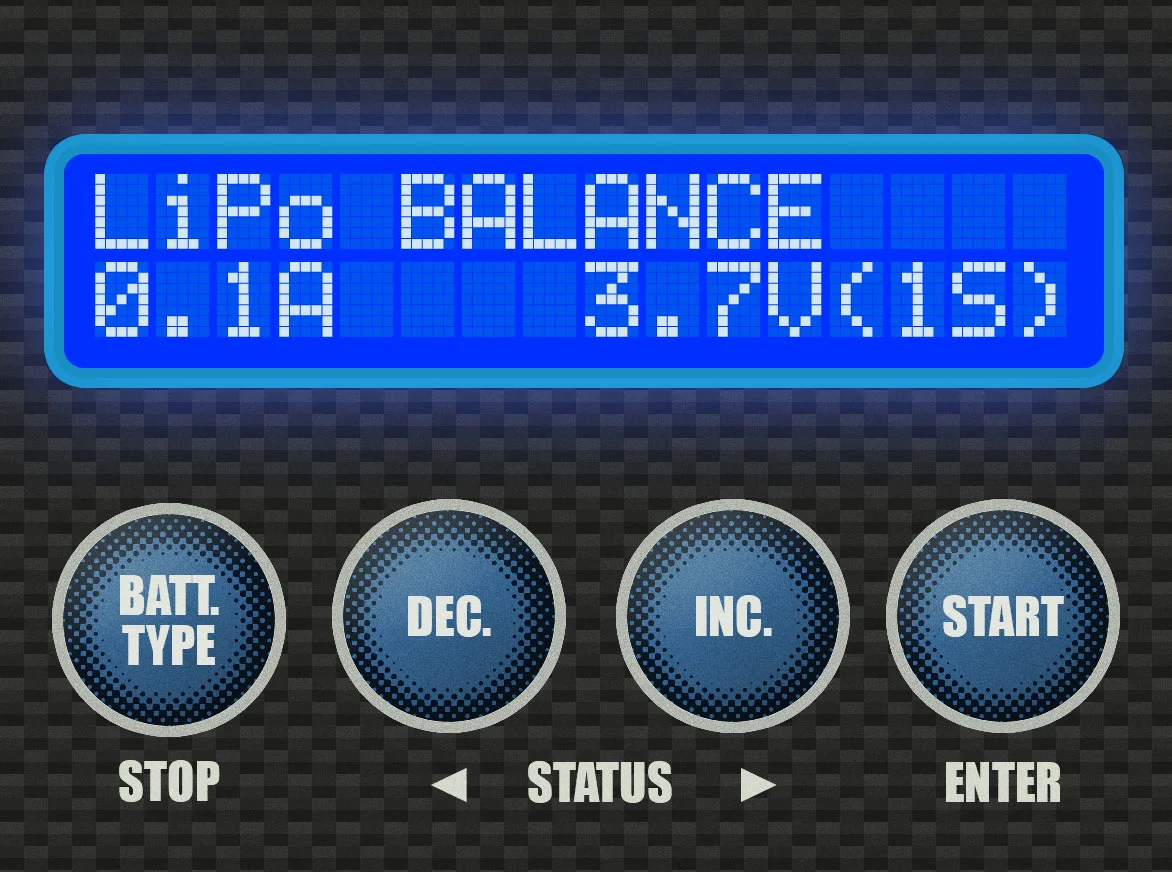
Pace iii
This screen, whatever the numbers, should come upwards. This is the screen that we want. Instead of simply charging, we want to balance the LiPo also.
Press the [START] push button. The "0.1A" will starting time to glimmer.
Step 4
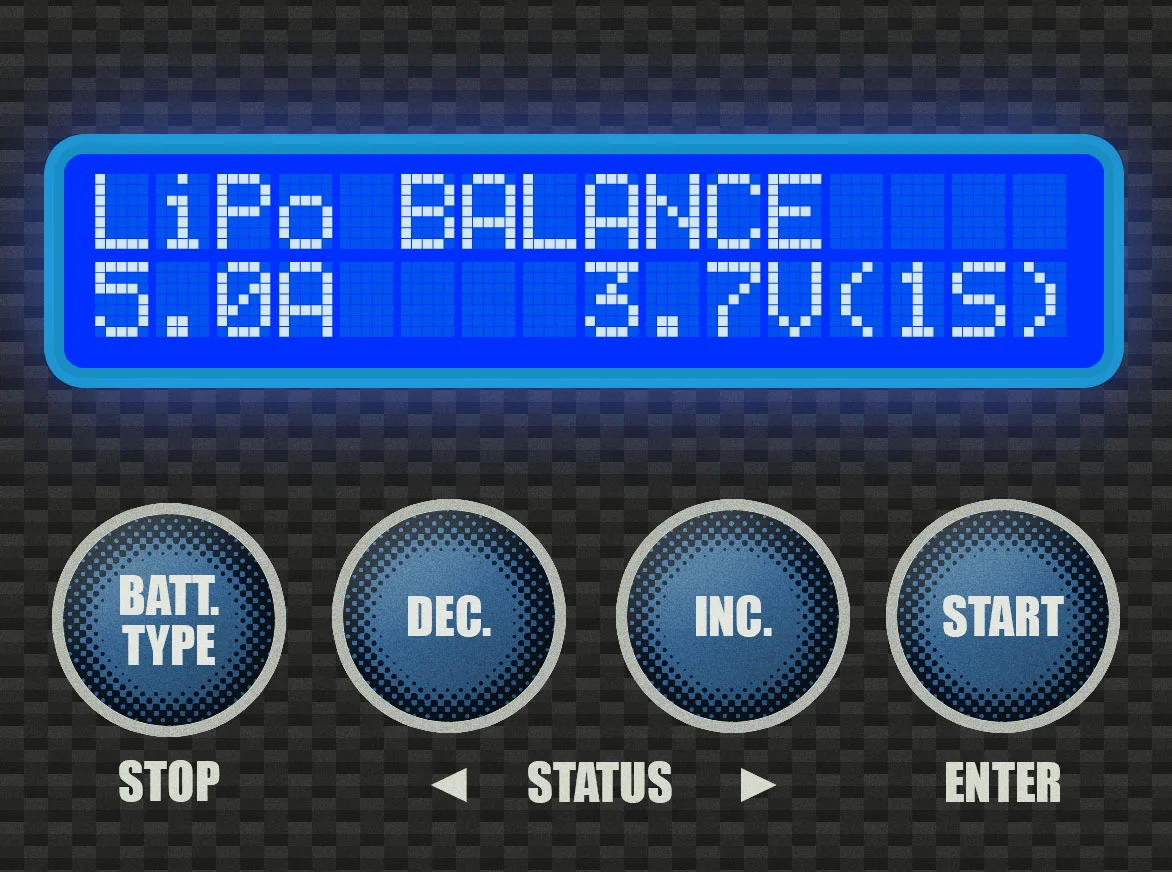
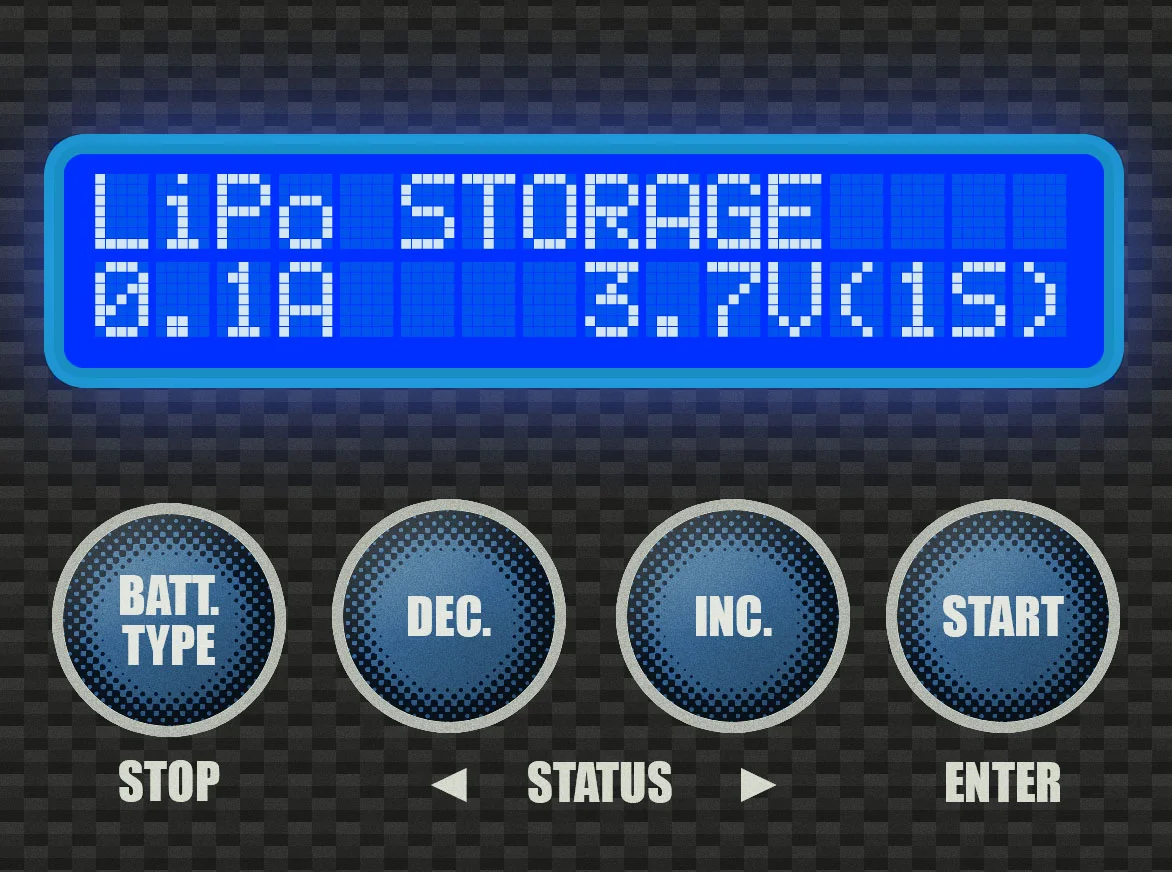
For this 2-cell v,000mAh LiPo, according to the formula in the previous department, the charge rate should exist 5.0A. Remember: Capacity multiplied past the charge rate indicator (i.e. 1C accuse rate, 3C charge rate) will give you the right accuse rate.
Utilise the [INC.] or [Dec.] buttons to select your charge rate. It will go up or downward in increments of 0.1A. In one case you're at the correct charge rate for your battery, printing [START]. The "3.7V(1S)" volition start to blink.
Step v
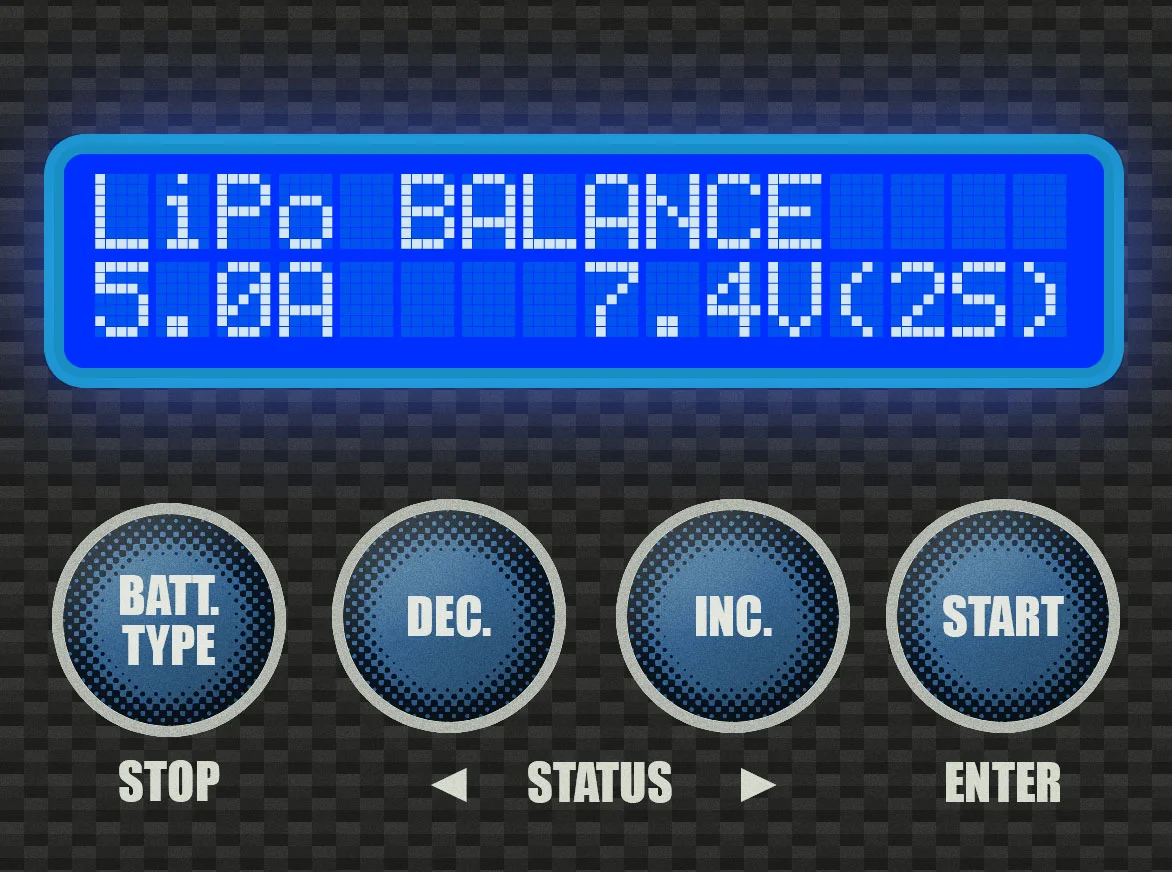
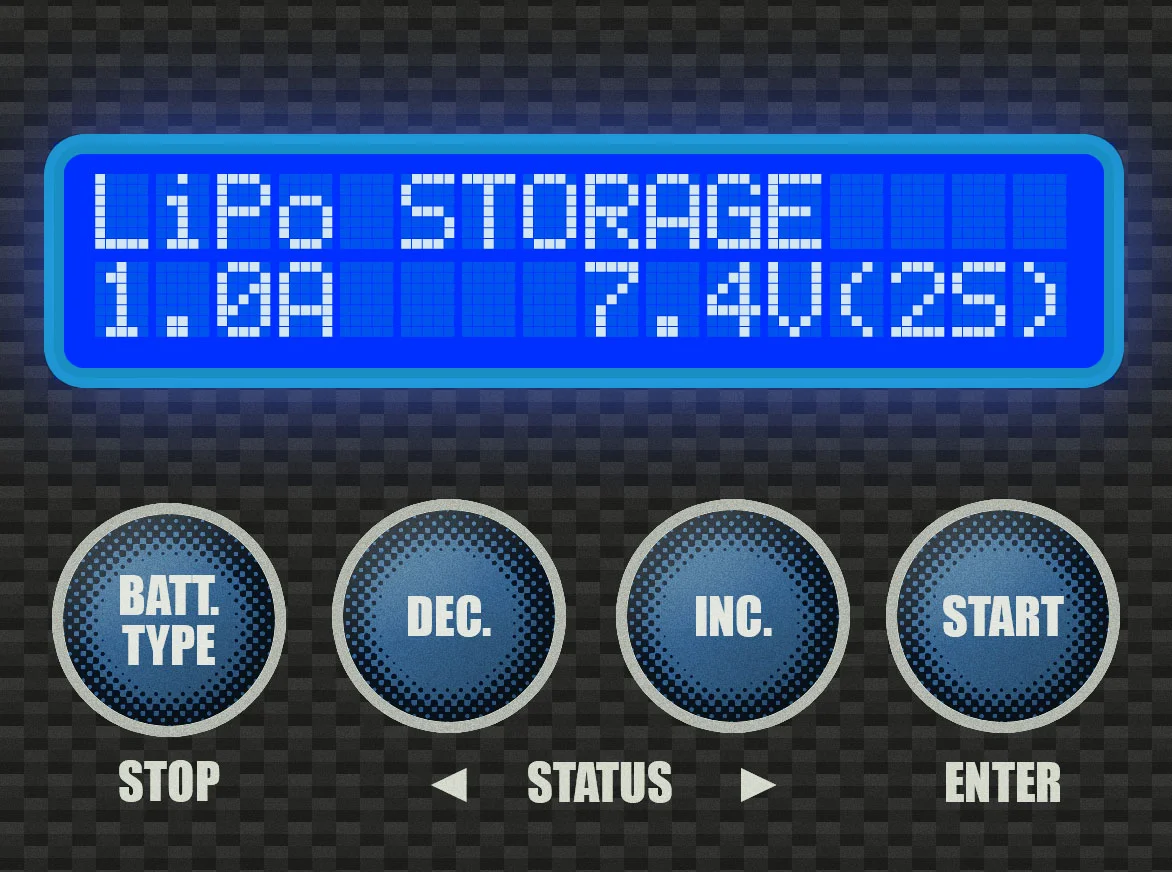
At present we need to select the correct jail cell count. Match the voltage up to the battery you take. In this example, we'll select 7.4V(2S).
Utilise the [INC.] or [Dec.] buttons to select your jail cell count. It volition go up or down in increments of 3.7V. Once you're at the correct prison cell count, press and hold the [START] button.

Step half-dozen
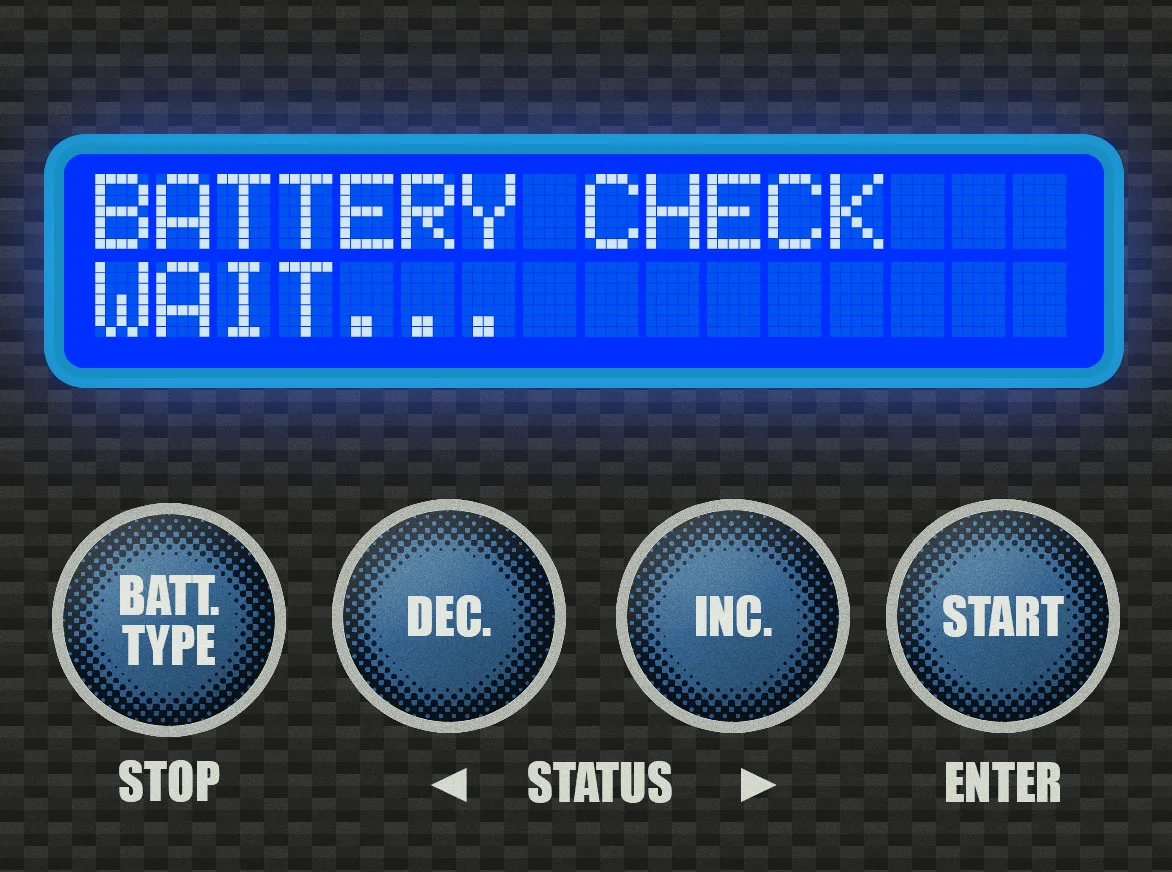
When y'all press and hold [Get-go] equally instructed in a higher place, the charger will beep and flash this message to you. Then it will proceed to the next screen.
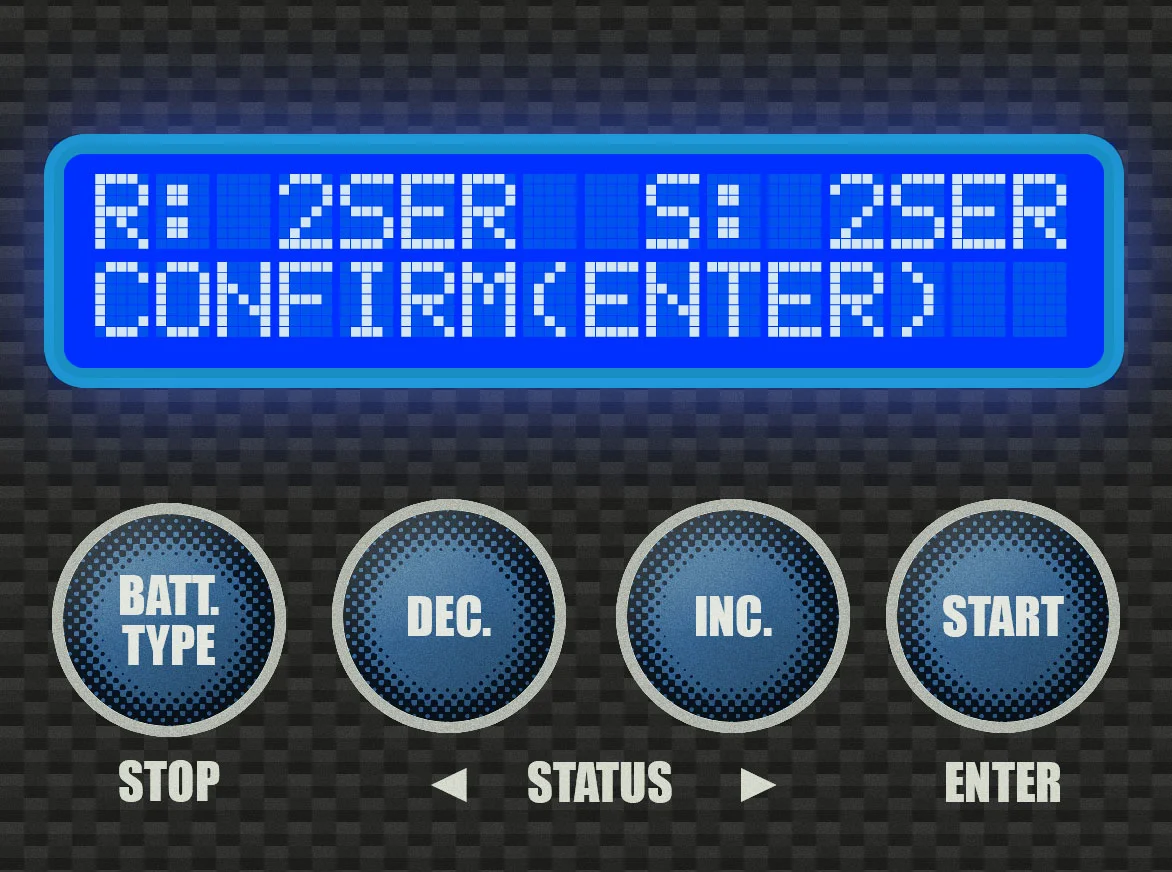
Footstep 7
This screen is trying to make certain that y'all entered everything correctly. It's proverb you submitted 2 cells in series and it reads 2 cells in series. When you are charging LiPos, both of these values have to match. If they practice, printing the [START] button again. If the values don't match, press the [BATT TYPE] push button and ready your mistake. Then repeat back to this point.
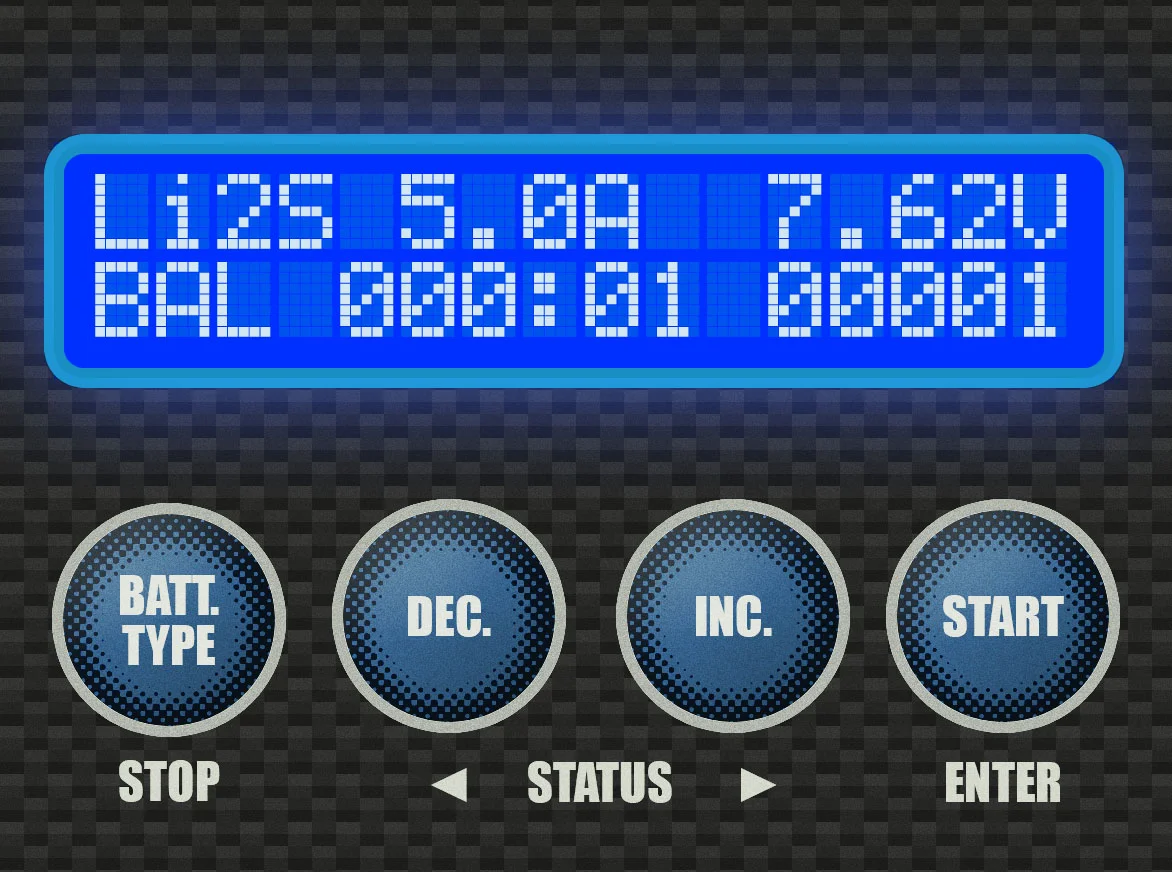
Pace 8
Assuming both values matched and you pressed the [First] button, yous will meet some variation of this screen. The battery is now officially charging! It volition beep when it's washed.
If you want to check the status of the individual cells, press the [INC.] push button, and it will brandish the screen below.
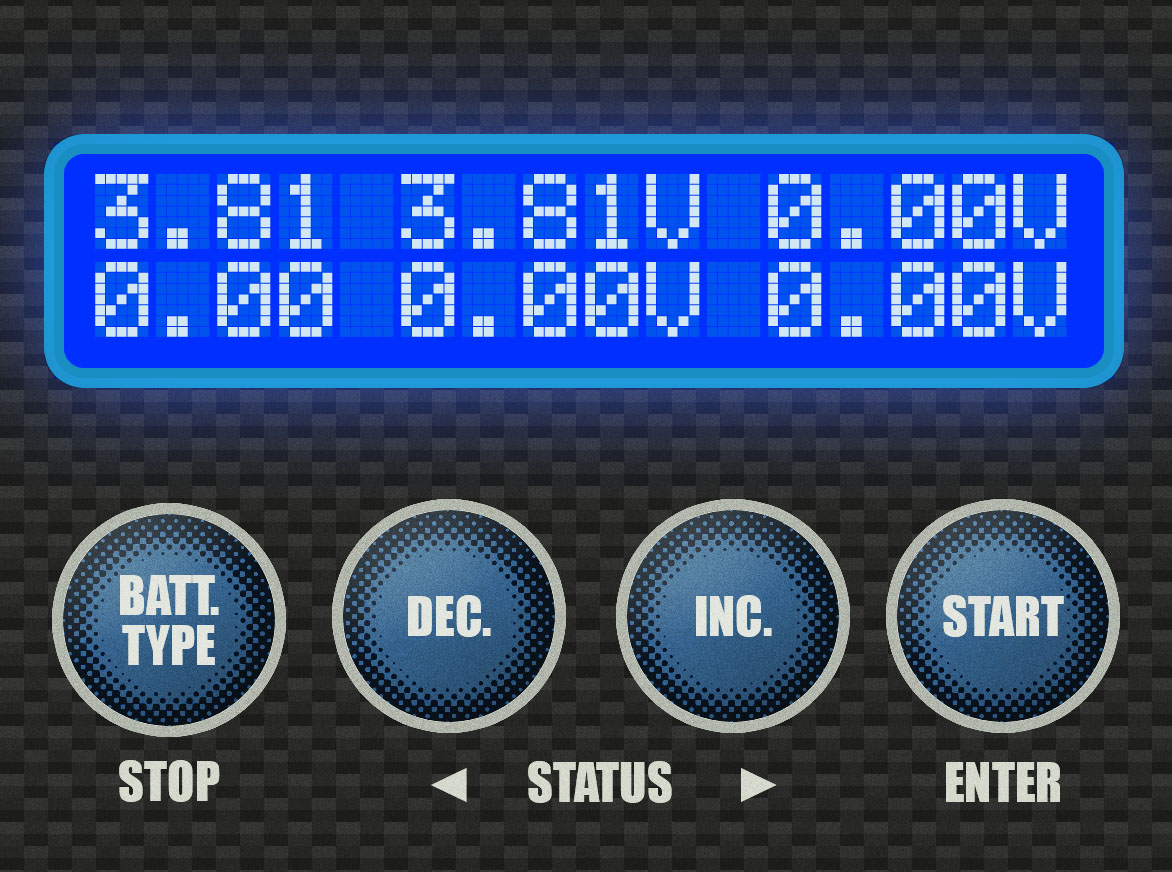
Pace 9
If you pressed the [INC.] button at the previous screen, y'all'll see this screen. The values will probably be different, just what y'all see is the individual voltages for each prison cell in the battery.
Here, the voltages read three.81V and iii.81V; the LiPo is pretty well balanced. Since this is simply a ii-cell battery, we're only seeing 2 values and everything else is just "0.00V". With a college-cell count battery, you would run into more of those zilch values populate.
Y'all can press [INC.] again at whatsoever time to view the previous screen, and if yous desire to stop charging for whatever reason, press the [BATT TYPE] button earlier unplugging the bombardment, except in an emergency.
That is how to residual charge a LiPo battery. Next nosotros will expect at another of import aspect of owning a LiPo battery: storing them properly with the LiPo Storage function on your multi-charger.
How to Storage Charge / Discharge a LiPo Bombardment
Storage mode works just similar charging. We set the numbers, make sure everything is plugged in, and the charger will beep when it'southward done. You do not demand to exit the battery plugged in until you use information technology once more, nor should yous. It's best to unplug the battery as soon every bit the charger lets you lot know the battery is washed.
Let's get to work. In this example, I will employ the same 5000mAh, 7.4V (2-cell) LiPo as before.
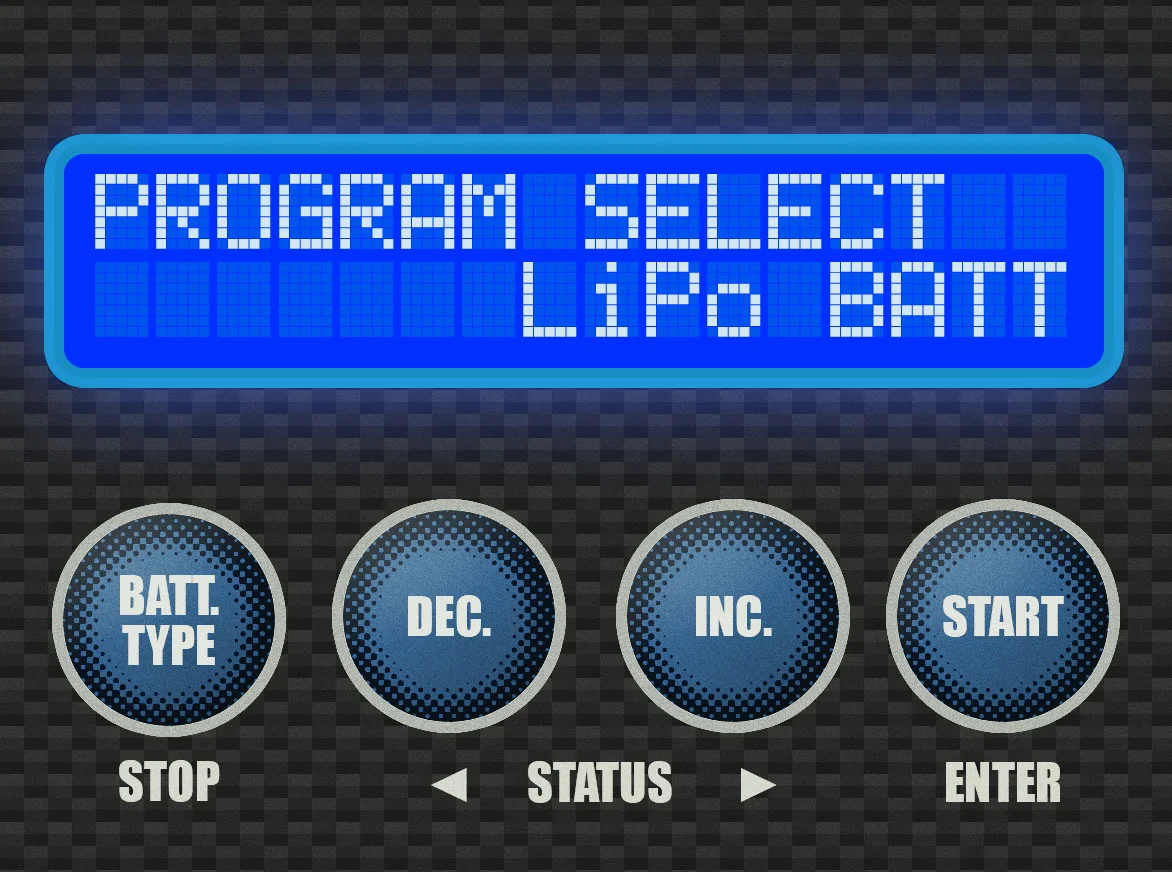
Pace 1
Press the [BATT TYPE] push button enough times to meet this screen.
Again, yous should have the battery plugged in at this point, both to the principal accuse lead and as well to the balance lath.
Press [Offset].

Footstep 2
This is the LiPo Charge screen, like we saw above. Since we're working on LiPo Storage, nonetheless, this isn't the screen that we want. Press the [INC.] button three times.
Step 3
Information technology y'all pushed the [INC.] button three times in the previous step, you lot should see this screen. Again, the numbers may exist different – that's fine. We will change them to adjust our needs anyhow.
Printing [START]. The "0.1A" should offset blinking.

Step 4
Press the [INC.] button enough to get the charge/discharge rate up to the correct accuse rate of the battery, in our case, 5A.
All the same, on most chargers, the max y'all tin go on storage is 1.0A, considering the charger discharges at 1.0A max. If that's the case on your charger, just max information technology out at 1.0A. That is what we will practice here besides, since the charger we're using maxes out at 1.0A. If yours goes college, just make sure non to go above the safety charging rate for your bombardment.
Press the [START] button. The "3.7V(1S)" will showtime blinking.
Step v
Just similar when we balanced charged the battery, we need to select the correct voltage and cell count.
Our example battery is a ii-jail cell LiPo, so that means we're setting information technology for 7.4V(2S) using the [INC.] or [DEC.] buttons to increase or decrease the value, respectively.
In one case everything is correct for your bombardment, printing and hold the [Offset] button.
Stride 6
When you lot printing and hold [START], the charger will beep and flash this message to you lot. Then it will go along to the next screen.
Step vii
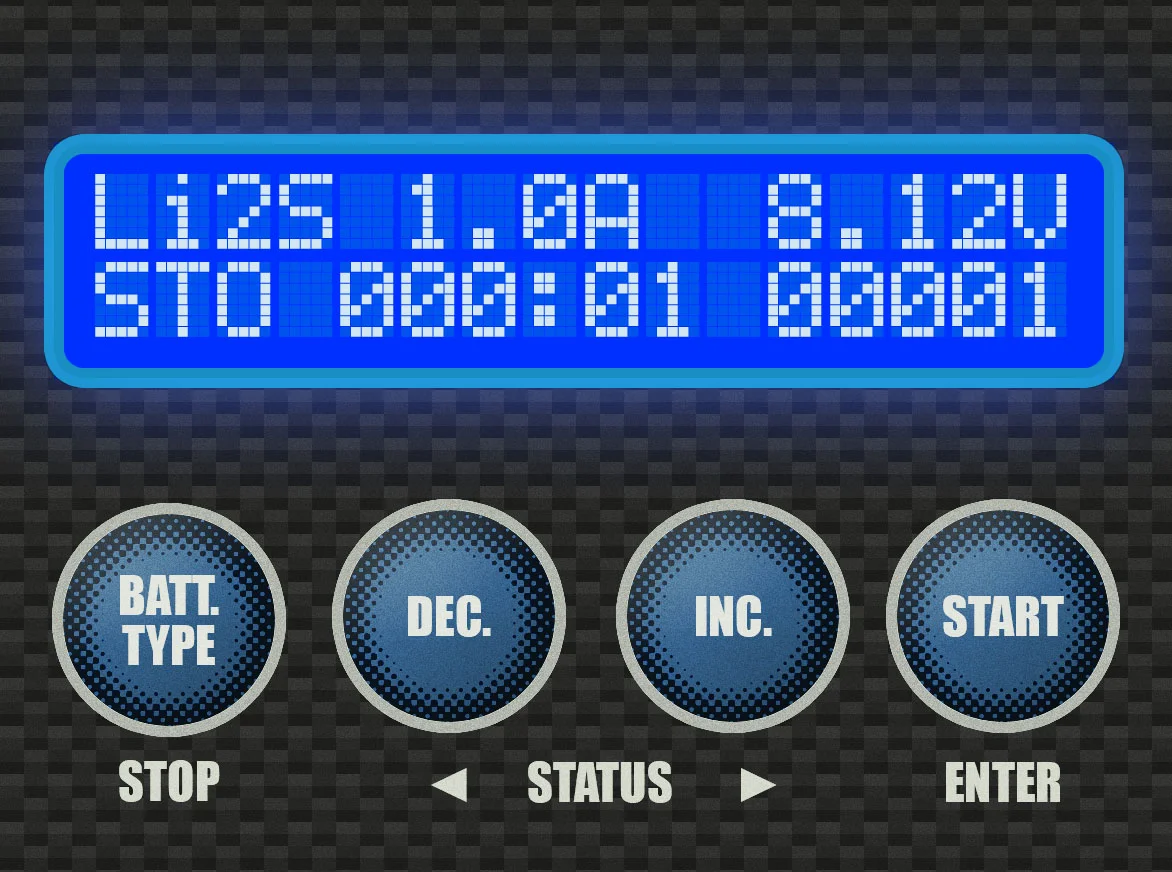
For whatever reason, it won't enquire you to confirm prison cell counts on storage fashion. Instead, information technology takes you to the main charge screen. As with residuum charging, hit the [INC.] button to view the individual cell voltages.
The charger is now putting your battery into storage mode, either charging or discharging as needed – information technology will figure out what needs to exist done. It volition beep when it's finished, simply like when charging.
And that'due south Storage mode on your multi-charger. Zippo mystical, but a neat feature that you now know how to utilize.
Now Go Accept Fun
We've gone over the nearly basic functions of these multi-chargers. Now that you know how these bones mechanics work, you should be able to easily figure out the rest of them equally needed. Your new charger does many, many things – most of them you volition never use, and going through all of them would probably be a waste of time for most people.
Only do explore all the menus in the charger, and familiarize yourself with where they are should you lot ever need to get to them for something.
Simply more importantly, become that battery charged and go accept fun! Don't forget to talk to your local hobby shop with questions, or contact us. Nosotros'll be happy to help!
Modify Log
-
October 23, 2012 - Guide published.
-
May 12, 2016 - Gude removed for updating.
-
May 28, 2016 - Guide carve up into two guides, for 2 different charger UIs. This modify log now just reflects this guide.
-
May 28, 2016 - Guide back up at new URL.
 | Brian Schneider / Brian is the manager, webmaster, & social media guru for Roger'due south Hobby Center. He's been in the hobby industry over a decade, teaching people the essentials of the R/C globe. He's written a number of helpful guides, including A Guide to LiPo Batteries. |
Source: https://rogershobbycenter.com/multichargers102
Enregistrer un commentaire for "Traxxas Batteries Should I Charge Again if Sitting for a Few Months"